HTC Vive - Installation
 | |
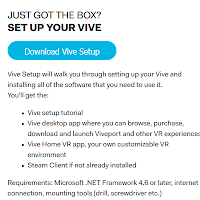
| First step - follow this link! |
1 - Install the Base Stations
- Base Stations: These are the units that track where in the room the controllers and headset are and which way they are pointing.
- Room Scale: This is the feature that allows you to actually walk around in games. You can define a safe area (that you have to clear of clutter) and then this transforms into a space in games you can also walk around. You'll also see references to "Room Scale VR" which is defining the experience of walking around in a virtual world, as opposed to just sitting down with a headset on. Also you may see references to "Room Scale Space", which is the real world you have created to walk around in.
 |
| Base station mounted with bracket |
No, the first challenge is how you set up the base stations themselves. The trick is, they need to be 2 metres high, which isn't something I became aware of during my own research! The second trick is, they need to be near mains sockets.
The instructions suggest you might be able to use speaker stands, but I've got speaker stands for my Creative Surround Speaker system and they don't go anywhere near high enough, barely over a metre. So, the other solution is to actually mount the speakers on the wall, which probably means drilling holes.
Luckily, HTC do expect this, and you get 2 simple but effective mounting brackets to go with the basestations, so you can just place it on the wall where you want it to go, draw your drill points on the wall through the screw points with a pen, and then get the drill out and do the business. The brackets come with rawl plugs, but these are for plasterboard walls. If you've got plasterboard then these will be perfect for you, but if you are drilling into brick, like me, you can just use regular wall plugs if you happen to have them (which I do).
I don't have a mains socket in one corner of the room so I do have an ugly power extension cord there at the moment, I need to fix that in the future.
So once you've got your base stations up and powered on, the instuctions do mention making sure they are on opposing channels, and there is a physical sync cable you can use if the base stations can't connect to each other wirelessly, but the base stations were set up and worked straight out of the box for me.
2 - Install the Link Box
- The Link Box interfaces between your PC ports and your headset. You plug in video, USB and power one side and your headset plugs into video, USB and power the other side. You might ask what's the point? It's needed because your link box is plugging into video, USB and power in 3 different places, your mains socket may be a metre away from your PC, and your USB and video ports might not be right next to each other either. The Link Box presents them all together for your headset so actually the 3 connections merge into one cable and you are dragging 5 metres of only 1 cable behind you with the headset as opposed to three 5-metre cables.
 |
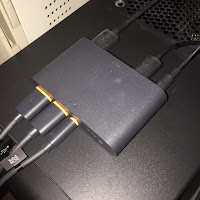
| Link Box stuck to the top of my PC |
You need your monitor and VR system both plugged into the same graphics cards, but many graphics cards only come with one HDMI port (as mine does, an Asus GTX 970 card).
The Link Box does have a Mini DisplayPort you can use with a DisplayPort on your graphics card, but the HTC Vive doesn't come with it.
So actually, this had me stuck. A DisplayPort to MiniDisplayPort is easily available on Amazon for £5 to £8, but you have to wait another day! In the end, I jumped out to Argos and bought a quite expensive DVI to HDMI cable, I plugged my monitor in using that and used the HDMI port for the Link box.
So actually, out of the entire unboxing and installation process, the lack of a DP to miniDP cable is the only bugbear I have about the whole setup. Looking online, this is by no means a rare problem, with many VR capable cards only having one HDMI port, so quite why a £759 piece of kit can't include a DP to miniDP cable as well as an HDMI cable, I don't know.
I also felt like a bit of a tool because before I ordered the Vive, I stuck my head under my desk and round the very dusty rear-side of my PC and thought "Yup, 2 HDMI ports, great." Wrong! That second port was a DisplayPort!
A final good touch to note about the Link Box. You attach 5 metres of fairly heavy-duty headset cable to this thing, and the Link Box is really light. To help you solve this problem the Link Box comes with a double-sided black adhesive pad to stick the Link Box to something. I'm lucky in that my PC was perfectly situated to have the Link Box stuck on top of it, so I quite liked that little feature.
The good news is, the rest of the installation is plain sailing
3 - Install the Headset
- It's probably quite self explanatory, but the headset is the main point of why we are here. The headsets contains two 1080x1200 resolution displays, each with a lens to enable your eyes to focus on them at close range. The headset also contains a standard 3.5mm headphone jack, which you can plug the supplied (rather naff looking) earphones into if you like, or you can do the audio justice and plug in your own half-decent quality earphones for proper sound. The headset plugs into power, HDMI and USB 3.0 sockets on the Link Box, but these multiplex into a single heavy-duty 5m cable that is robust enough that you don't have to panic when (not if) you stand on it whilst playing.
This is as simple as plugging in the cables to the Link Box. As I say above, the HTC Vive does come with a fairly crappy looking pair of earphones, which would suffice to get up and running, but really I think if you are spending £759 on a VR system, you really do owe yourself a favour and should at least buy a basic pair of Sennheisers off of Amazon, why scrimp on the audio?
At this stage you might argue for HTC including more than a crappy sear of earphones, but this is par for the course in this cost cutting world. Take a look at all those iPhone users that use the provided Apple earphones (which are junk, and don't get me started on the wireless ones for the iPhone 7).
Anyway, headset installation - complete.
4 - "Install" the Controllers
 |
| Two mains sockets for 2 controllers? |
At some stage I'll check the power ratings for those and buy a dual USB socket plug. I mean, at this stage we are using 5 mains sockets, 2 for the basestations (where at least it makes sense), 1 for the Link Box and 2 for the controller chargers. I don't know about you but it didn't occur to me to check how many mains sockets I had before buying this thing.
5 - Install the Software
 The software installation is not that difficult, but it could be easy to get lost in it because there are 2 or 3 stages to it. Luckily the walkthrough process makes it completely easy, and in fact directs you to install some software in the background whilst you are doing other stuff, which is a nice touch to stop you waiting around for your internet to keep up.
Unless you've been living under a rock these past years or somehow you are brand new to PC gaming (good luck to you in that case), you already have Steam. In which case you need to install Steam VR, which is as easy as installing any game on Steam.
In fact, you also install VivePort as part of this process. I kinda understand why HTC wanted their own shopfront, Oculus have their own that they like to jealously guard, but really I would have much preferred if it could have all been done in SteamVR. I have enough problems with managing seperate game installation clients as it is, Steam I like, GOG is okay, Origin I could do without (but resigned myself to for Dead Space 3) and now I get Viveport as well.
Summary
So overall, you'll look back on the installation process and think "Wow, that was a lot of steps", but as I said earlier the Vive setup process does a really good job of taking you through it step by step, so it wasn't overly problematic, it just takes a bit of time.All in all, the real problems with installation are only the logistical issues of the 2m height for the base stations, the second HDMI port and the number of mains sockets you need. The actual putting together of the product couldn't really be any easier considering how many parts there are.
No comments:
Post a Comment